Tuesday, August 18

Intro to Graphic Design and Illustration - Day 1

I have made a new blog for my Introduction to Graphic Design and Illustration
classes this fall at the University of Central Missouri. You can follow our course progress and view student blogs through the blog here:

http://ucmintrof09.blogspot.com

The first day's post is a detailed process on setting up their own blogs and online tools for class.
These include setting up a Gmail email account and thereby a Google account, a Picasa web album, and Delicious social bookmarking.

Monday, August 3

Studio Art Online Course

I have just completed teaching a 6 week online studio art course.
I think that it worked very well. This blog was created for that course. I had all of my students create their own blogs, you will find links to their sites in the sidebar. The course was titled: Digital Studio Techniques. Because all of our work had a digital end product to it we were able to easily share our work. A blog is a very easy way to post images. Another advantage of the blog format is that a student is forced to write/talk about their work at the same time. I love the way that a blog also provides a forum where peers and professor can comment on the work. It is a great way to create a real community among the students, similar to the way a group studio works. Many students either are not used to commenting and critiquing in class or are too shy to do so. The online format also allowed students to work whenever they could. I believe that I got far more working hours out of my students than I ever do in a face-to-face class. Lectures and demonstrations were recorded using Adobe Connect software and posted online. These lectures allowed me to record my screen and voice while I worked in applications to demonstrate techniques. We also used FTP programs to upload final, high resolution images, to a server. I hope that this course has jump started my students into an independent art and writing production process.

Tuesday, July 28

Pencil Technique From Photo


Here I have tried the new technique working from a photo by redrob2.co.uk. Seems to work. As always it will probably look better done from life.

Pencil Figure Drawing Technique


See the Blackboard Announcements for July 28th to view the 16 minute recording demo. I worked on finding some better techniques that would work in a life drawing situation. I found some hi-res images of Gil Elvgren's figure drawings on the Heritage Auctions site. I used the paper background to make a new paper that I could use as a background for any drawing. I sampled an even area of shading and defined it as a pattern. I then used the pattern stamp tool with my custom brush settings to paint back in the pencil texture. I use a fairly consistent diameter brush with opacity set to pen pressure for the shading and a size pressure brush with no opacity change for the line work. I was able to copy most kinds of drawing textures that he has fairly well.

Saturday, July 25

Figure Drawing


I did the figure drawing thing with Jeff, Ryan, Dustin, & Tony on Friday. It was hard to get into it after not having done it for so long. I brought in a laptop and wacom tablet. It is a lot of fun to be able to work in layers and change things if they don't work. I like how the line work is going but shading tools still are hard to figure out.

Thursday, July 23

Interpretation of DeCarlo Style


This is based on the Process Test Model image and pose from an earlier post. I think that a more cartoony style works far better than something that is so loyal to the photograph.

Tuesday, July 21

Old Cartoon Techniques DeCarlo


I like these old DeCarlo cartoons for several reasons. These ink and inkwash drawings are clean and simple with a great graphic quality.

Monday, July 20

Textured Halftones and Illustrator Lines


I really love the rich work of Illustrator Gary Taxali you can see his website here:
http://www.garytaxali.com/
I recorded this technique in the July 20th Lectures in Blackboard.

Thursday, July 16

Process Test Model


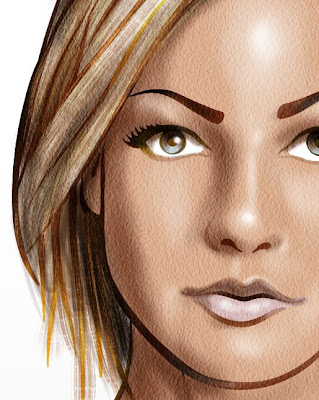
I did a trial process based on a few of the techniques that I have developed recently. I started with some photos of models from clothing retailers. I stitched together several different models in Photoshop to get the pose and clothes I wanted. Then I redrew the figure with the blob brush in Illustrator. Then into Photoshop for coloring and brush strokes etc... works pretty good. A little lifeless because the source was a photo.

Monday, July 13

Matt Smith Illustration


Here is a study from an illustrator named Matt Smith. See his website here: http://www.matt-illustrations.com/index-kids.html
Original is on top, copy on bottom. I did the linework in Illustrator with the blob brush then imported to Photoshop for everythign else. I still need to figure out a better way of doing the lighter version of the line drawing. His has a lot of great texture that burns into the image.

Saturday, July 11

Randall Whiteis Study


I saw in Jacob's blog a study that he had done from an artist named Randall Whiteis see his site here: http://www.randallwhiteis.com/
He uses crisp vector lines with smooth airbrushy shading. I did a study of one of his pieces here. The original is on bottom. It starts with lines in Illustrator. I kept all of the shading separate from a local color layer. I left more of the original dark vectors in the head than he did. I also changed head and other areas a little.

Wednesday, July 8

Clay models as a starting point


After looking at Ryan's post with the clay model that he made to work out some perspective issues in his rendering I got an idea. Why not just work from or on top of the photo of the clay model. Here you can see my partial results. I think it could be a pretty good process.

Test of Lightwindow


This is a test of the lightwindow script.

Friday, July 3

Application of Watercolor Technique 1


Here is my test of my two brushes for watercolor and ink. Again this is entirely Photoshop about 2hrs. Too bad I worked from kind of a goofy picture.

New Watercolor


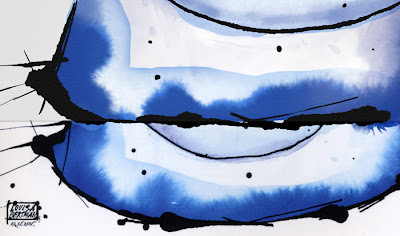
Here I have another study the top portion is my copy of the bottom. I created two new brushes to do this. The first is the fuzzy brush for the wet on wet look, and the second is a lumpy spot for the line work. I used the photocopy filter to get the edge reticulation (darkening). This was done entirely in Photoshop with a wacom tablet.

Thursday, July 2

Watercolor Tests

Here are 3 versions of the same image. The first one with the paper texture I did using entirely Photoshop. The second one is done entirely in Painter. The last one with two garlics is the original.


I got more of what I wanted out of Photoshop with the watercolor than I did from Painter. I took a big speckley brush and opened up the spacing and jittered the angle. I masked those marks with a bristley brush set to wet edges and used that same wet edges in overlay to get the way that watercolor marks look darker at their edges. I think Painter does a much better job at the loose ink brushwork. I wasn't doing a good job of matching the saturation in the photoshop version.

Wednesday, July 1

Fantasy Painting in Photoshop Test


I wanted to try and do some fantasy type painting just to try it out. This is all working directly in Photoshop. It is funny how changing a few layers can change the whole image.

Tuesday, June 30

Illustrator multiples and Photoshop Masks


I did a little demo today on using Illustrator to create 3D block text and multiple step and repeat lines. Next I copied those paths into Photoshop and used them to get selections for fills and for masks. This is in response to a project that Dustin is doing check out his blog. Also see the recorded demo on June 30th announcements in Blackboard.

Hard Edged or Photo Rendering


I did a demo today, 46 minutes long, too long. I took the same area of the master study that Ryan had on his blog and used a technique where you create paths in Illustrator, import the paths in the paths area of Photoshop and then use them to make selections and to stroke with brushes. This way you can have precise control over your brushes and brush work. Check out the link to the recorded lecture in Blackboard.

Monday, June 29

Marker Tests 1


Here in the following 2 images I did some tests in Photoshop trying to replicate the look of hand-done marker rendering. Karman is looking at using this piece as a study. You can see the demo I recorded to make these in the announcements. Look in blackboard announcements: Mon, Jun 29, 2009 -- Permanent -- Day 5 Lectures - summary: karman_marker_1 (26min).

Wednesday, June 24

Illustrator Line Work

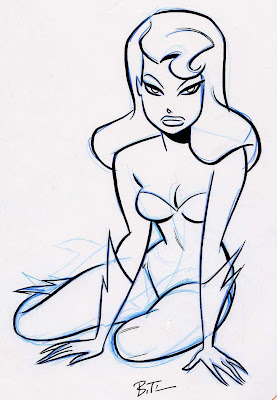
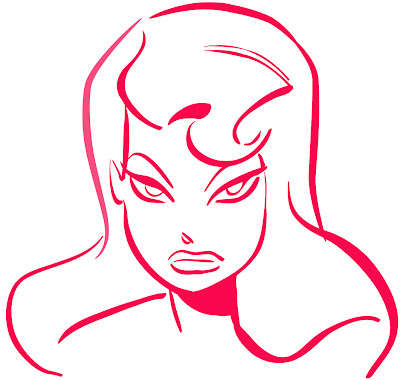
I did lectures today on using Illustrator brushes to do line work. I am using as a masterwork a Poison Ivy sketch by Bruce Timm that I got off of Heritage Auctions. I went over the different brush tools including the vector pen, calligraphic brush, art brush, and the blob brush. The blob brush is by far the easiest to use if you have a wacom tablet and pen. If you don't have those I would recommend working with custom art brushes.

Here is the original image:


Here is the copy that I made in Illustrator:

Monday, June 22

First Post


This is my first post on this blog.