Tuesday, July 20
Thursday, July 15
Monday, July 12
Tuesday, June 22
Test of Shadowbox Script

This is a test of the shadowbox script for displaying larger images from thumbnails.
Great for portfolios!
Here is a video showing how it is done
Wednesday, June 16
Picasa and Flickr Portfolios
Both Google's Picasa and Flickr offer good options for posting personal portfolios. With Picasa you can easily create an album that will run as a slideshow with high resolution images. To showcase this portfolio to a potential client you simply send them a link to the album. You can post this link in an email or your blog or on a simple personal web page. Albums can be made private or public. Captions and sections for comment are also easy to use. If you have a Blogger/Blogspot blog then you already have a Picasa account where it keeps every image you post to your blog in an album.
Link to Picasa
Link to Flickr
Here is an example of a link to a Picasa Album:
Sample Album
Link to Picasa
Link to Flickr
Here is an example of a link to a Picasa Album:
Sample Album
Portfolio Communities
There are many websites that offer the ability to create a portfolio on their hosted website. Most of these offer free space so that a large enough number of quality users populate the site and permit the parent site to sell advertising. Choose carefully what sites you choose to use to showcase your work. The reputation of the site and the quality of the portfolios there reflect on you. AIGA has cooperated with Behance to offer this service. I recommend their site as a good professional option. Link to Behance I believe that you have to sign up and get an invitation to post. Make sure you indicate that you are a BFA Illustration or Graphic Design Student.
As an Illustrator you may also want to try Deviant Art or CG Hub as places to put a portfolio. But beware of the fact that there is a lot of sub-par, work on the Deviant Site and it carries that reputation with it.
As an Illustrator you may also want to try Deviant Art or CG Hub as places to put a portfolio. But beware of the fact that there is a lot of sub-par, work on the Deviant Site and it carries that reputation with it.
Using a Lightwindow Script for Portfolios
One of my biggest frustrations with student portfolios sites is when they have a tight little site with thumbnails and a very small area in which to view larger sized work. You really need to be able to show of your work at the largest size possible online. This is fairly easy to do if you use a lightwindow type javascript library. Go to this page I created for examples of the scripts in action.
Lightwindow Scripts Example Page
If you like what you see here you can view the source of the page you like and copy out the scripts that appear in the head of the document and then apply the class names that you see in the body.
Click on this thumbnail image below to see an example of how these scripts work. And in a blog!

Portfolio Blog Site
There are a lot of ways to present your work and yourself through an online presence. One of the easiest is the blog, just like this. It is free! There are tons of tools already set up to work with the blog format. And perhaps most importantly it is easy for other people to find you. The trick becomes how to arrange and customize the blog to be just what you want it to be without all of the other distractions. Consider a simple portfolio blog where you load thumbnail images into a single post. When those images are clicked it opens up a larger image for people to look at. The sidebar can contain your basic contact information. You can also have links in the sidebar to other posts, which in turn can contain other information or sections of your portfolio. Blogger lets you create up to 6 active blogs per login.
Tuesday, June 15
Friday, June 11
Illustrator and some brushes
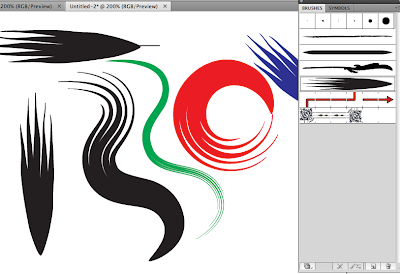
Here is a video on using the Illustrator Art Brush:
Art Brush Video
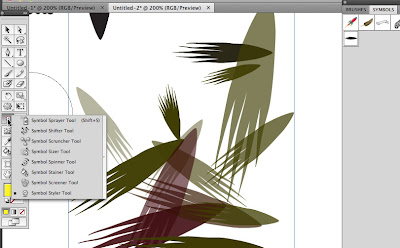
Here is a video on using the Illustrator Symbol Tools:
Symbol Tools Video
Art Brush Video

Here is a video on using the Illustrator Symbol Tools:
Symbol Tools Video

Final Week
Hello All,
This next week is our final week of class. I have copied this from our schedule for your benefit here:
So, what to do.
During the previous weeks of the course you have had the opportunity to try out a lot of processes. What will you take away from this class? Has there been some great discovery/discoveries that will change the way that you work? This doesn't mean just a singular technique or brush. How will you approach your future artworks and what role will the computer play in those projects? This is your opportunity to teach.
Make sure that you create a blog post that includes a reflection on the class and what you have learned.
Option 1: Create a detailed tutorial that another student could follow. Walk them through a process of digital techniques taking time to describe not only the technicals but the "whys" behind what you do.
Option 2: Present and discuss your professional digital arsenal. Do you intend to continue to use a blog as a professional illustrator/designer? How will your blog help you get jobs? Would you post technical tutorials on your blog? Would you showcase sketches and works in progress? Would you have downloadable portfolios? Accessible Picassa Slideshows? Can you show and evaluate other professional illustrator/designer blogs and how they use them effectively to get work. What role can social bookmarking, links to other sites, and followers play? Do you have a companion portfolio website? How can you go about setting that up? Are there free options?
Option 3: What is the big perspective view of your process? How do you research an idea? Do sketches happen manually or digitally? How do you gather reference images and how do you use them? How do you create the elements of your piece? How do you present a work in progress? How do you get critiques and feedback on a work in progress? What communities and forums do you participate in? How do you get help with a problem or a question? How do you present a finished piece? How do you promote your work and yourself as an artist? How do you find and get freelance work or commissions? How do you communicate with clients? How do you deliver your work? How do you get paid? Of all of the previous points how many of them are digital, what tools and techniques are involved?
Here are some finals from last year:
Jessica Pine
Final and Reflection
Website
Dustin Williams
Proposal
Part 1
Part 2
Karman Thompson
Reflection
Examples
Joe Trotter
Part 1
Part 2
Part 3
Reflection
Mike Freeman
Proposal
Research
Reflection
Progress
Jeff Porter
Website Progress
Website
Ryan Valle
Proposal
Progress
Portfolio
Jacob Gorman
Post
Tutorial
This next week is our final week of class. I have copied this from our schedule for your benefit here:
Week 6
For the final week of class you will make a proposal and plan for personal integration. Putting it all into perspective. Getting all of your digital tools and online resources to work for you. You may use this time to research additional tools or further develop a technique or process from previous weeks. Will you develop a webpage for self promotion? What online tools would you use to get freelance jobs? What communities will you join and participate in? What connections will you make with your peers? What will you use to continue to learn?
Final Day
Present final findings and conclusions for personal application on blog.
So, what to do.
During the previous weeks of the course you have had the opportunity to try out a lot of processes. What will you take away from this class? Has there been some great discovery/discoveries that will change the way that you work? This doesn't mean just a singular technique or brush. How will you approach your future artworks and what role will the computer play in those projects? This is your opportunity to teach.
Make sure that you create a blog post that includes a reflection on the class and what you have learned.
Option 1: Create a detailed tutorial that another student could follow. Walk them through a process of digital techniques taking time to describe not only the technicals but the "whys" behind what you do.
Option 2: Present and discuss your professional digital arsenal. Do you intend to continue to use a blog as a professional illustrator/designer? How will your blog help you get jobs? Would you post technical tutorials on your blog? Would you showcase sketches and works in progress? Would you have downloadable portfolios? Accessible Picassa Slideshows? Can you show and evaluate other professional illustrator/designer blogs and how they use them effectively to get work. What role can social bookmarking, links to other sites, and followers play? Do you have a companion portfolio website? How can you go about setting that up? Are there free options?
Option 3: What is the big perspective view of your process? How do you research an idea? Do sketches happen manually or digitally? How do you gather reference images and how do you use them? How do you create the elements of your piece? How do you present a work in progress? How do you get critiques and feedback on a work in progress? What communities and forums do you participate in? How do you get help with a problem or a question? How do you present a finished piece? How do you promote your work and yourself as an artist? How do you find and get freelance work or commissions? How do you communicate with clients? How do you deliver your work? How do you get paid? Of all of the previous points how many of them are digital, what tools and techniques are involved?
Here are some finals from last year:
Jessica Pine
Final and Reflection
Website
Dustin Williams
Proposal
Part 1
Part 2
Karman Thompson
Reflection
Examples
Joe Trotter
Part 1
Part 2
Part 3
Reflection
Mike Freeman
Proposal
Research
Reflection
Progress
Jeff Porter
Website Progress
Website
Ryan Valle
Proposal
Progress
Portfolio
Jacob Gorman
Post
Tutorial
Thursday, June 10
Wednesday, June 2
Adjustments Ferris
Texture and Light!
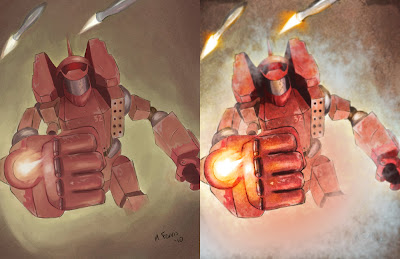
I believe I used this brush for clouds, angle jitter 100% and opacity pressure:

I also copied the red channel, adjusted its levels and used a blending mode. Did similar thing with the blue channel.
Very little additional strokes besides the cloud with the orange for the fire.
Also did a blurred copy of the image with a radial mask letting a crisper fist show through.

I believe I used this brush for clouds, angle jitter 100% and opacity pressure:

I also copied the red channel, adjusted its levels and used a blending mode. Did similar thing with the blue channel.
Very little additional strokes besides the cloud with the orange for the fire.
Also did a blurred copy of the image with a radial mask letting a crisper fist show through.
Adjustments Gorman
Tuesday, June 1
Texture Test for Blake
I did this texture test to see if I could get some of those crazy grainy watercolor textures. Seems like it works. The secret is to have a very open brush that you can mess with.
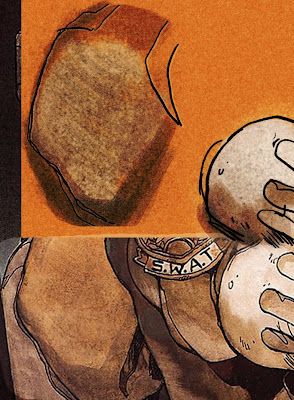
These are two of the images I made into brushes:


If you save these images you can open them in Photoshop and "define brush presets" from them.
Click here for a short video on how to load and use these brushes
I also did a little bit of reticulation/spatter/blur for texture in flat all-over areas.
Click here for a short video on how to do the over-all grainy reticulation based texture.

These are two of the images I made into brushes:


If you save these images you can open them in Photoshop and "define brush presets" from them.
Click here for a short video on how to load and use these brushes
I also did a little bit of reticulation/spatter/blur for texture in flat all-over areas.
Click here for a short video on how to do the over-all grainy reticulation based texture.
face for Bennett
Don't be afraid of texture in your brushes!
Watch a quick video on textured brushes
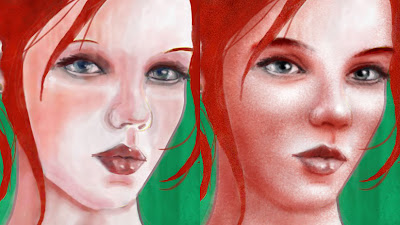
Here is the brush image:

Watch a quick video on textured brushes

Here is the brush image:

Monday, May 31
Wednesday, May 26
Week 3, Day 3
Hello,
A few new recordings on brushes and stroking vector paths with brushes in Photoshop:
more natural brushes for Photoshop
paths from Illustrator to Photoshop and stroked with a brush
Photoshop based vector path stroked

A few new recordings on brushes and stroking vector paths with brushes in Photoshop:
more natural brushes for Photoshop
paths from Illustrator to Photoshop and stroked with a brush
Photoshop based vector path stroked

Tuesday, May 25
Week 3 Day 2
Hello,
Here is something for Tifani:
This is a link, please watch: Engraving like lines like Hundley piece
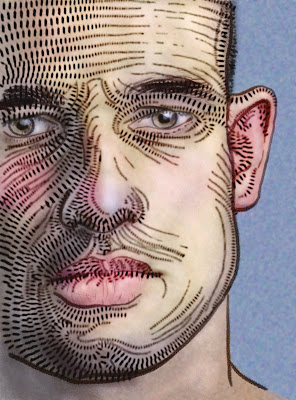
Here is something for Tifani:
This is a link, please watch: Engraving like lines like Hundley piece

Here is a video teaser for the perspective thing people are talking about. There are books in our library here on perspective. A pretty good one called "Perspective for comic artists" I think that is what it's called.
Monday, May 24
Week 3, Day 1
My post titles probably don't make sense.
Anyway, this is the third week of class. Which means that at the end of this week you should have completed through your second original work. I have posted some grades in Blackboard to help you keep track of where you are in that process. It is great that some of you are ahead of schedule. Those who are behind schedule should put in some extra hours. Or maybe just post on your blog your progress so that I don't worry about you so much.
Please make sure that you take time to watch the recorded lectures that I post on this blog.
This is a link, please watch:
halftones relaxed
This is my interpretation of my comments for M.Ferris. The front hand of course would need real line-work to look good again.
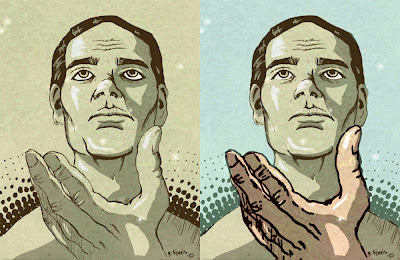
This is a link, please watch:applying colors to line drawings with mask
Anyway, this is the third week of class. Which means that at the end of this week you should have completed through your second original work. I have posted some grades in Blackboard to help you keep track of where you are in that process. It is great that some of you are ahead of schedule. Those who are behind schedule should put in some extra hours. Or maybe just post on your blog your progress so that I don't worry about you so much.
Please make sure that you take time to watch the recorded lectures that I post on this blog.
This is a link, please watch:
halftones relaxed
This is my interpretation of my comments for M.Ferris. The front hand of course would need real line-work to look good again.

This is a link, please watch:applying colors to line drawings with mask

Thursday, May 20
Week 2, Day 7
Hello,
It took some time to work up this example, but I think it is important to see.
I wanted to show that Photoshop paintings don't have to be slick. They can have rich textures that look a lot like they were done with a real brush.
This is a link, please watch:
texture through brushes in photoshop painting
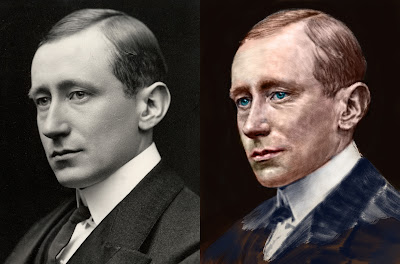
This is a link, please watch:
texturizer in photoshop painting
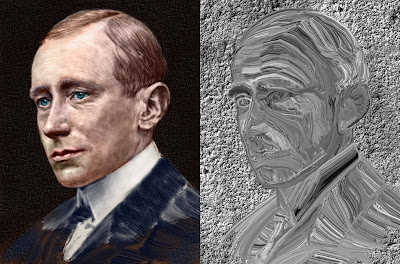
It took some time to work up this example, but I think it is important to see.
I wanted to show that Photoshop paintings don't have to be slick. They can have rich textures that look a lot like they were done with a real brush.
This is a link, please watch:
texture through brushes in photoshop painting

This is a link, please watch:
texturizer in photoshop painting

Monday, May 17
Week 2, Day 5
Video Lectures:
Using Fetch FTP to upload files to an online server
and
explanation of layers in robo demo shown below
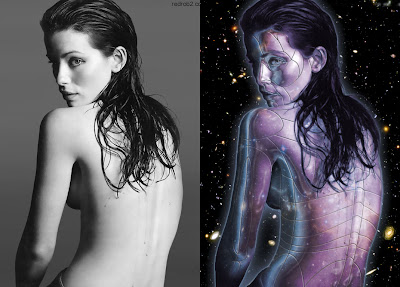
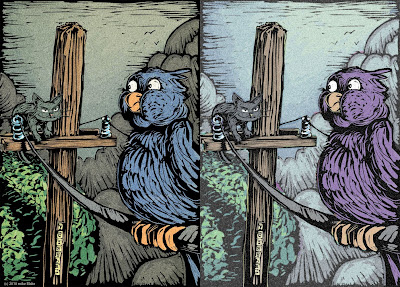
Plus, here is my quick example of the suggestions I was talking about on Mike Blake's blog:
Using Fetch FTP to upload files to an online server
and
explanation of layers in robo demo shown below

Plus, here is my quick example of the suggestions I was talking about on Mike Blake's blog:

Thursday, May 13
Day 4
Hello,
A couple of new recordings:
gradients Illustrator CS4
Illustrator gradients applied
added texture photoshop
reflections and displacement maps
keep up the good work.
A couple of new recordings:
gradients Illustrator CS4
Illustrator gradients applied
added texture photoshop
reflections and displacement maps
keep up the good work.
Wednesday, May 12
Day 3
Hello All,
Some great work from many of you.
Here are some new recordings in response to Mike Blake's questions:
saturation adjustment layer and mask
texture grain
using masks for woodcuts etc...
I intend to do one for Mike Ferris on random texture as well.
I will look into giving you all access to all of last year's recordings to help locate things like Jake Gorman mentioned with blending. Please let me know how you like the newer style recordings as opposed to the older Adobe Connect method.
As always watch for new comments on each other's blogs.
--David
Tuesday, May 11
Dig Studio Day 2
Hello All,
I am trying out a new recording tool.
You can view a recorded lecture on using the blob brush in Illustrator CS4 here:
blob brush
You will need to use the password: digstudio
I have commented on several blogs today. Be sure to read eachother's blogs
Tifani
Gail
Ferris
Gorman
the singing ninja?
I am trying out a new recording tool.
You can view a recorded lecture on using the blob brush in Illustrator CS4 here:
blob brush
You will need to use the password: digstudio
I have commented on several blogs today. Be sure to read eachother's blogs
Tifani
Gail
Ferris
Gorman
the singing ninja?
Monday, May 10
Digital Studio Techniques Day 1
Hello,
If you have made it here you probably know what is going on. There is a blog list on the right here that shows the blogs that I know of for our class members in Digital Studio Techniques. I am still missing four of our members. Please get me your blog. You are required to participate as a community. Read each other's blogs and post comments, suggestions, critiques. Other than Blackboard and the official announcements this is where I class happens.
Please notice the Delicious Tag roll on the side bar as well. I will post a link to a video recording on how to get that done. If you think you know how to do stuff just go to http://delicious.com/ and sign up. Once you have a delicious account you will log in and go to Settings/Blogging - Tagroll/(copy the script from the window) go to your blog click on Settings/Layout/Edit Layout/Add a gadget/HTML-Javascript/Now paste the code you copied from delicious into the field. And voila! you should now have a tagroll on your blog. Delicious is totally cool and really helps other people follow your web research. You can use it as a tool to find highly recommended art and design pages too from other people that are interested in the same things that you are.
Subscribe to:
Comments (Atom)


